When prototyping UI designs or code, we often need images to put in places when we have no finalized images in the design, or in order to test out different sizes and colors when only some are provided.
I find myself needing to find an image to use when developing websites and apps often, and finding a mock image to upload is time consuming - not to mention leaves possibly unwanted files in your code or design.
So what do we do?
Enter: placeholder.photo.
What is placeholder.photo?
Placeholder.photo is a service that lets you use placeholder images anywhere, saving you the hassle of creating images in the required sizes for temporary use-cases.
It is a tool that gives you an image URL to use anywhere, from any web or other origin.
Why would I need this?
Say you are working on implementing a website design in HTML/CSS and more languages of your choosing.
When confronted with the need to use an image, for, say, an image that exists on the design - usually I would put it in the appropriate asset location in the project.
But what if any of these is true…
- The image represents user uploaded content, so the size is variable?
- The image is not finalized and ready for use in the design?
- The image does not exist at all and a placeholder box is given in the design docs?
How does placeholder.photo help me solve this?
Now instead of having to go ahead and either find images of appropriate sizes, making sure they are uploaded to an accessible location online, or in the case of updates to the spec, now having to update said images…
You can just take a URL from placeholder.photo.

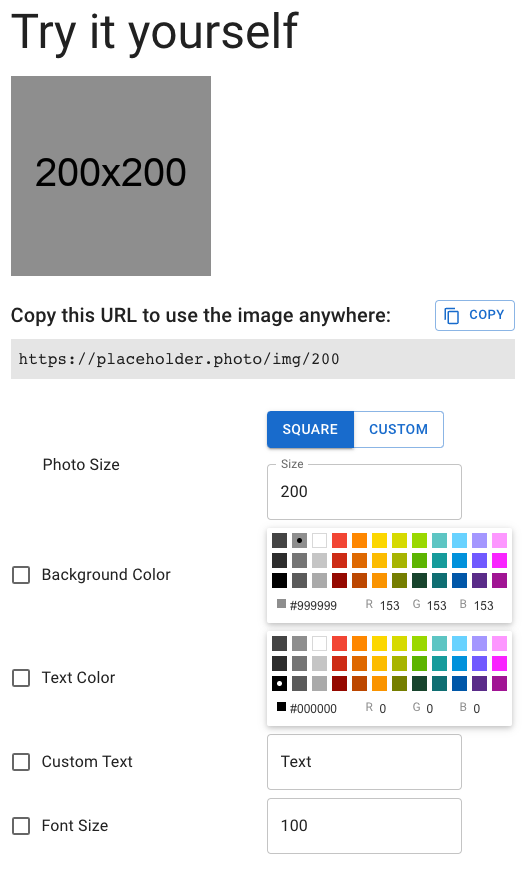
The preview tool lets you decide how the image looks by letting you customize size, background and text colors, the text content and font size.
But really, you can just customize the URL yourself and use the images as necessary without having to rely on it.
A URL like this:
https://placeholder.photo/img/255?bg_color=fb9e00&fg_color=ffffff&text=My+TextWill generate this image:
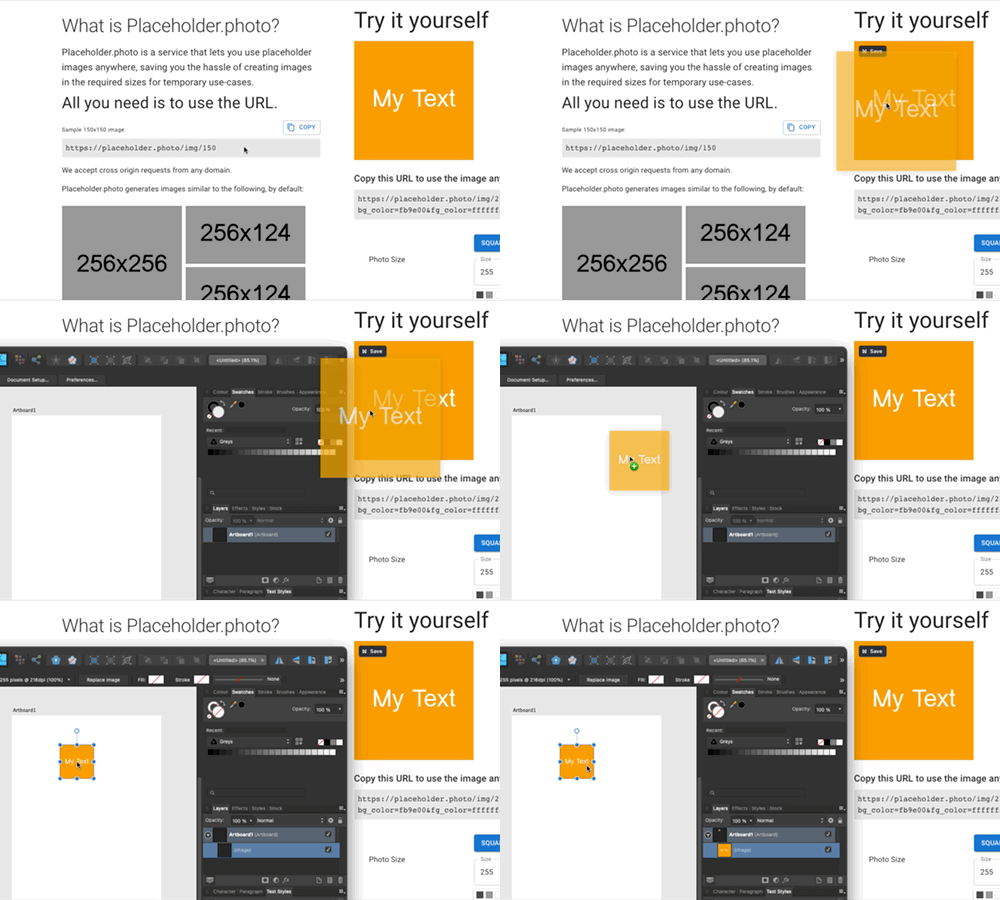
When generating from the tool, you can easily copy the image URL you made using the copy button:

Or drag & drop to a supporting tool:

And that’s it! Enjoy easier time coding & designing.

About the author
My name is Chen Asraf. I’m a programmer at heart — it's both my job that I love and my favorite hobby. Professionally, I make fully fledged, production-ready web, desktop and mobile apps for start-ups and businesses; or consult, advise and help train teams.
I'm passionate about tech, problem solving and building things that people love. Find me on social media:


